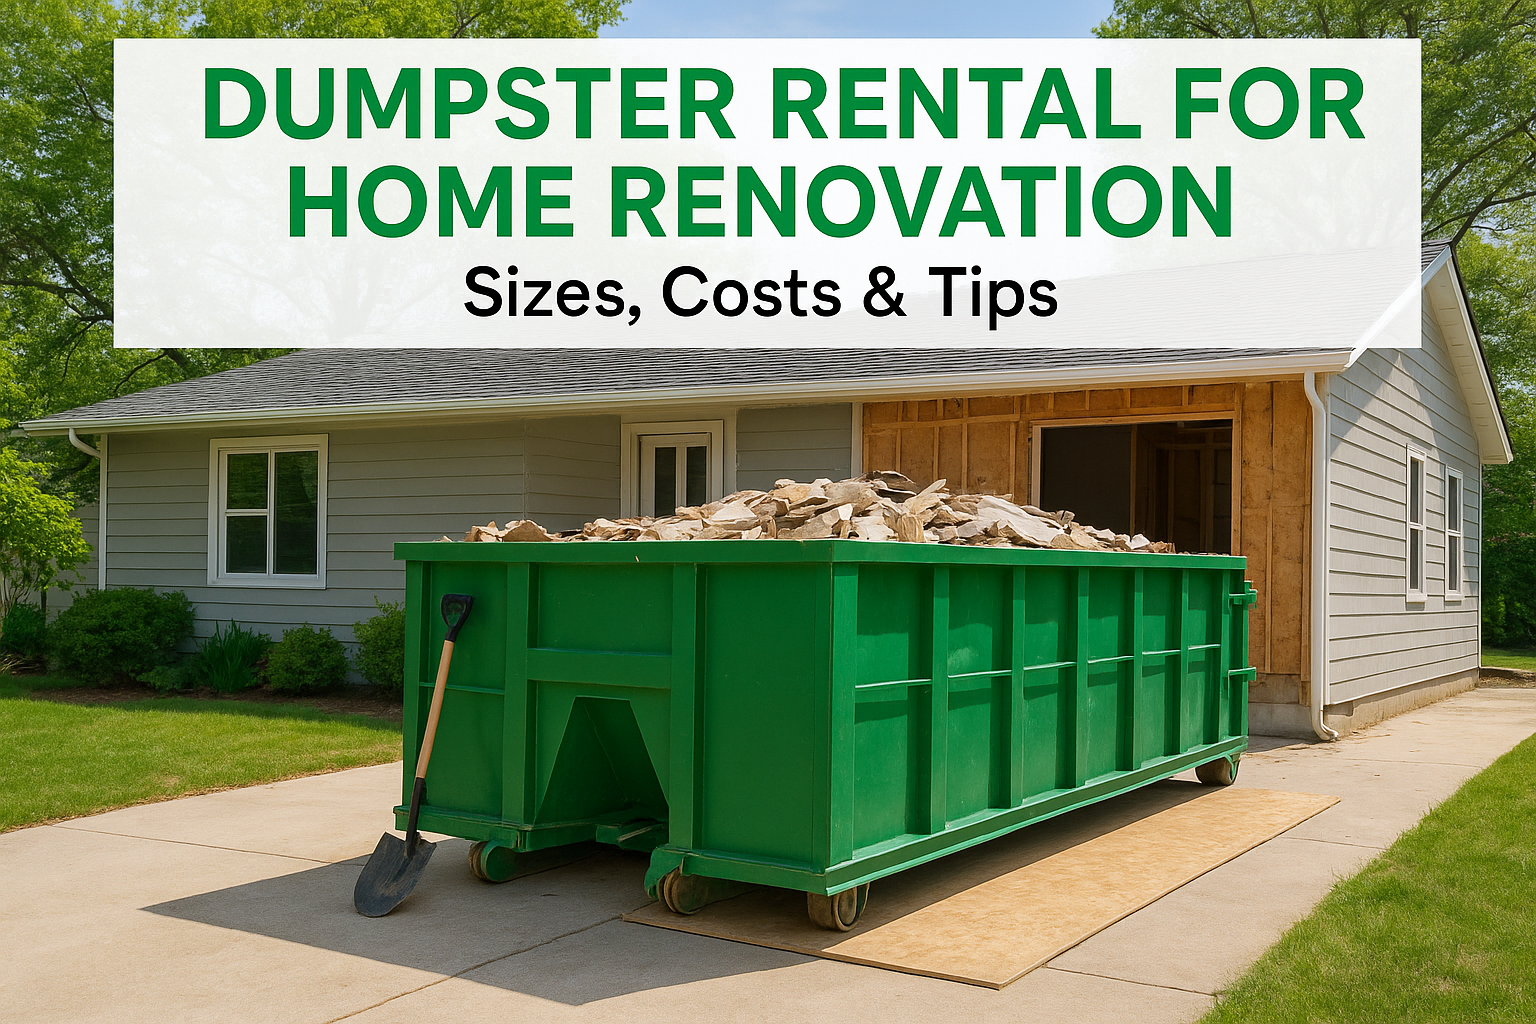
Tearing out a kitchen, ripping up flooring, or gutting a bathroom generates way more debris than most people expect. One demolished bathroom alone can fill the back of a pickup truck twice over. That’s why dumpster rental for home renovation projects isn’t a luxury, it’s a necessity if you want to keep your project moving without trash piling up in the driveway.
But if you’ve never rented a dumpster before, the process raises a lot of questions. What size do you actually need? How much does it cost? What can and can’t go in the container? Getting these answers wrong means paying for a second haul or, worse, stalling your renovation timeline while you figure out disposal.
At Dump Express, we’ve spent over 20 years delivering dumpsters to renovation projects across Cape Cod and Plymouth, Massachusetts. We’ve seen every type of remodel, every kind of debris, and every sizing mistake in the book. This guide breaks down exactly what you need to know, from choosing the right dumpster size for your specific project to understanding costs, rental periods, and a few tips that’ll save you real money and headaches.
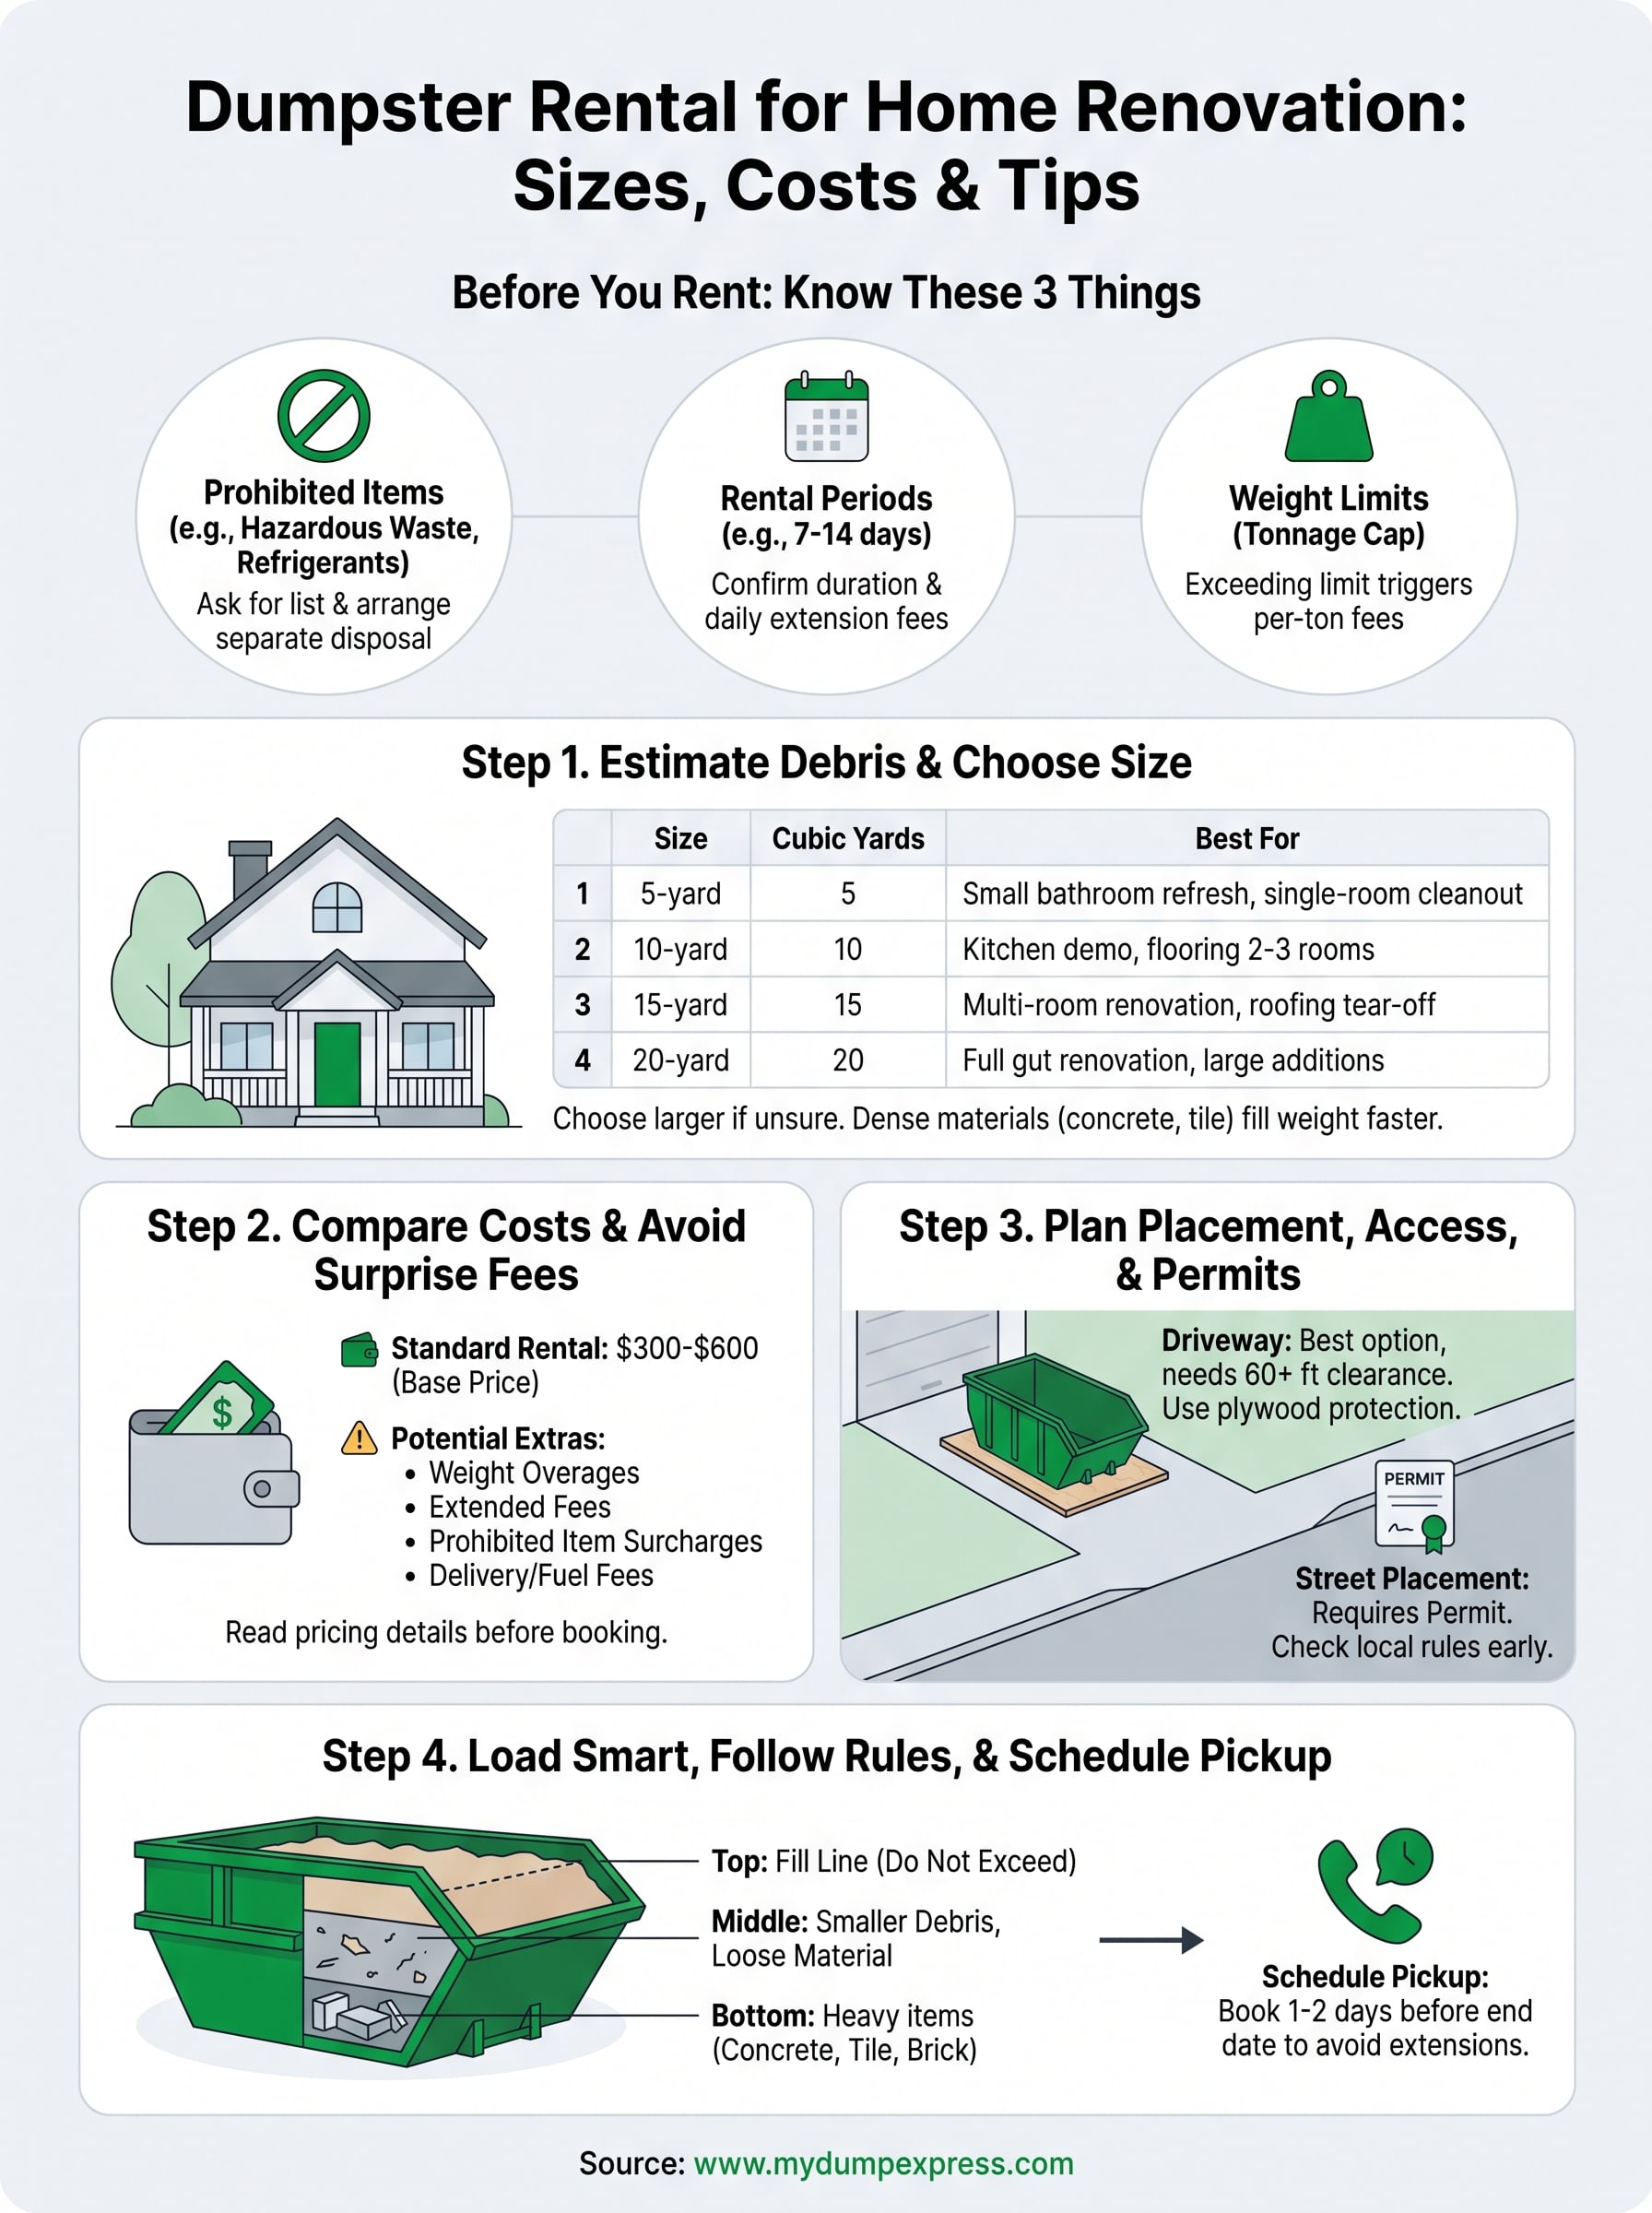
What to know before you rent a renovation dumpster
Before you call a rental company, three things will shape your entire experience: what you’re allowed to put in the dumpster, how long you can keep it, and how much weight you can load before extra fees kick in. Skipping this groundwork is the single most common reason renovation dumpster rentals turn into expensive surprises.
Prohibited items matter more than most people think
Most dumpster rental companies prohibit hazardous materials, and renovation projects are surprisingly full of them. Paint cans, asbestos-containing materials, refrigerants, batteries, and certain adhesives are typically banned from standard roll-off containers. If your renovation involves an older home built before 1980, there’s a real chance you’ll encounter asbestos in insulation, floor tiles, or drywall compound, and those materials require specialized disposal rather than a standard dumpster.
Always ask your rental company for a complete list of prohibited items before your delivery date so you can make separate disposal arrangements ahead of time.
Check your local waste authority’s website or the EPA’s household hazardous waste guidance to understand which materials require separate handling in your specific area.
Rental periods and weight limits affect your total cost
Standard rental periods typically run between 7 and 14 days, which covers most home renovation timelines. Larger remodels or multi-room gut jobs often run longer, so confirm the rental period upfront and ask what the daily extension rate looks like. Weight limits are equally important: most containers carry a tonnage cap, and exceeding it triggers a per-ton overage charge that can add hundreds of dollars to your final bill. Knowing both figures before the container arrives means your dumpster rental for home renovation stays on budget from start to finish.
Step 1. Estimate debris and choose the right size
The most common sizing mistake in dumpster rental for home renovation projects is guessing. Instead, walk through each room you plan to renovate and list every material you’ll remove: flooring, drywall, cabinets, fixtures, and framing. Bulky items like bathtubs and kitchen cabinets eat up cubic footage faster than loose debris does, so when you’re torn between two sizes, round up to avoid an overflow situation and a second delivery charge.
If you’re unsure between two sizes, choose the larger one – a half-full dumpster costs far less than paying for a second haul.
Match your project to a container size
Four standard roll-off sizes cover the full range of residential renovation projects. Use this table to match your project scope to the right container before you book:
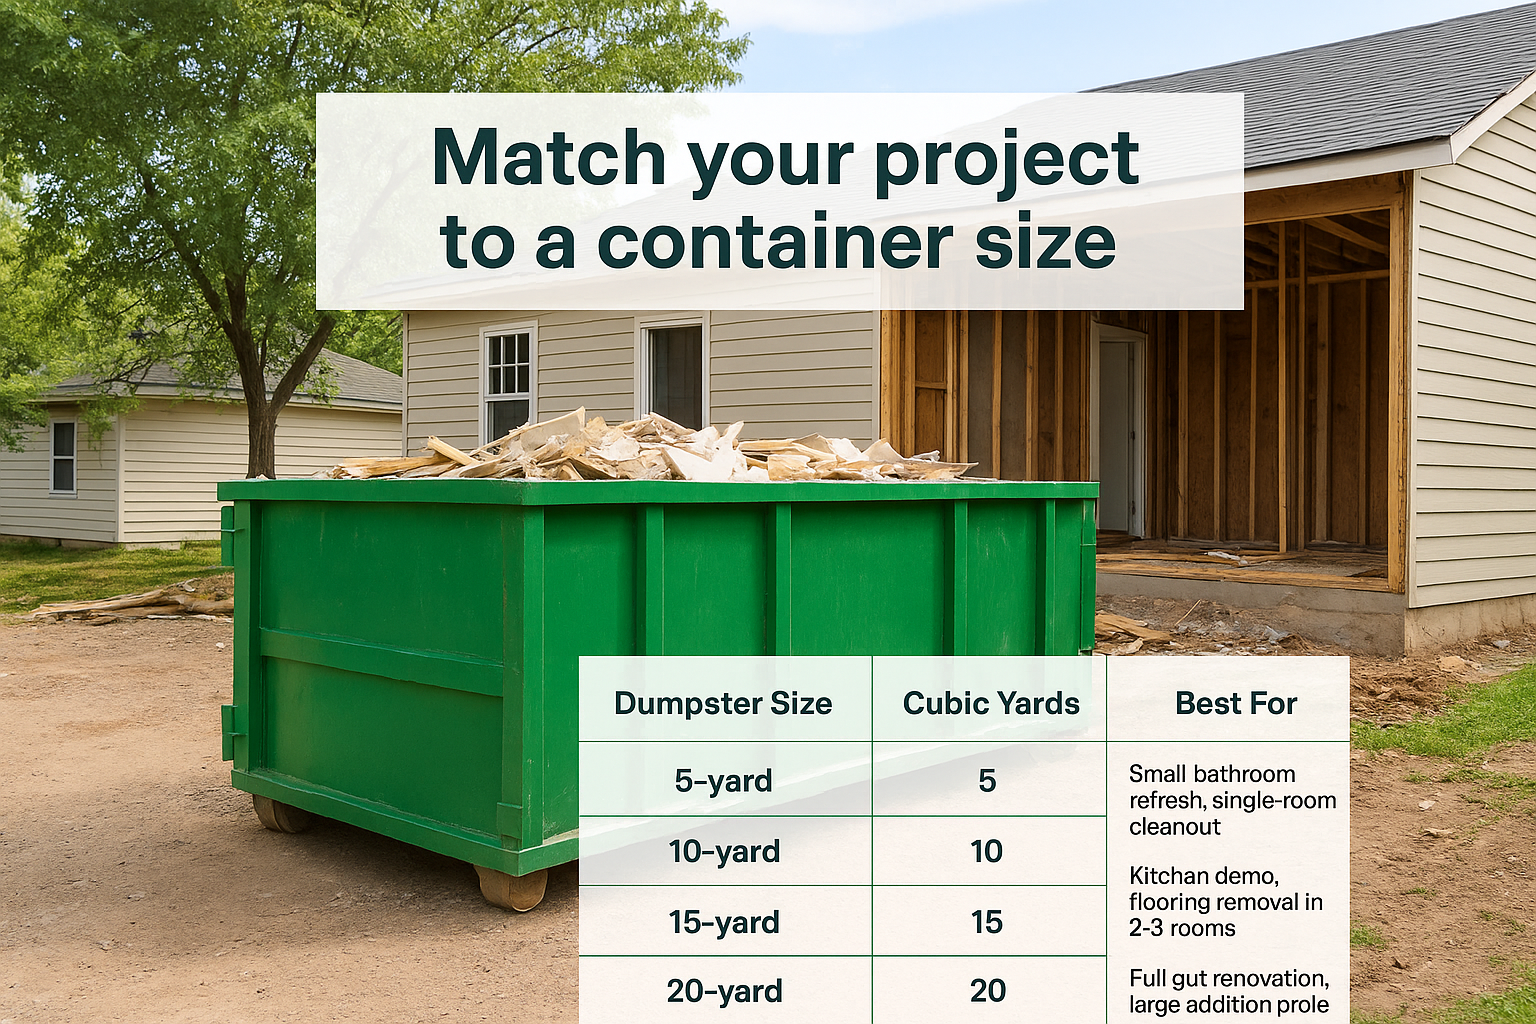
| Dumpster Size | Cubic Yards | Best For |
|---|---|---|
| 5-yard | 5 | Small bathroom refresh, single-room cleanout |
| 10-yard | 10 | Kitchen demo, flooring removal in 2-3 rooms |
| 15-yard | 15 | Multi-room renovation, roofing tear-off |
| 20-yard | 20 | Full gut renovation, large addition projects |
Dense materials like concrete, tile, and brick fill weight limits faster than cubic footage suggests, so factor in material type alongside volume when you make your final choice.
Step 2. Compare costs and avoid surprise fees
Dumpster rental for home renovation typically runs between $300 and $600 for a standard 7-to-14-day rental, but that base price rarely tells the full story. Location, dumpster size, weight, and rental duration all shift your final invoice, so read the pricing details before you book, not after the container arrives in your driveway.
Always request an itemized quote that spells out the base rate, included weight limit, overage rate, and any delivery fees before you confirm your order.
Know which fees catch people off guard
Several charges show up on final invoices that customers never saw in the original quote. Understanding them upfront gives you real control over your total cost. The most common extras include:
- Weight overages: Charged per ton once you exceed the included tonnage limit
- Extended rental fees: A daily rate applies for every day beyond your agreed rental period
- Prohibited item surcharges: Added when banned materials are found inside the container at pickup
- Delivery or fuel fees: Some companies add these separately rather than building them into the base price
Comparing two or three local providers on these specific line items, rather than just the headline price, is the fastest way to avoid a higher-than-expected final bill.
Step 3. Plan placement, access, and permits
Where you place your dumpster affects delivery success, safety, and your total cost more than most people realize. Rental companies need a clear path to set down the container, and the wrong placement choice can delay your dumpster rental for home renovation or create liability issues if the bin sits in a problematic spot.
Choose a spot before delivery day
Your driveway is almost always the best placement option for a residential renovation dumpster. It keeps the container off public property, protects the street, and gives your crew easy loading access. Before delivery, measure the available space: most 10-to-20-yard containers need at least 60 feet of clearance in length to account for the truck swing during drop-off.
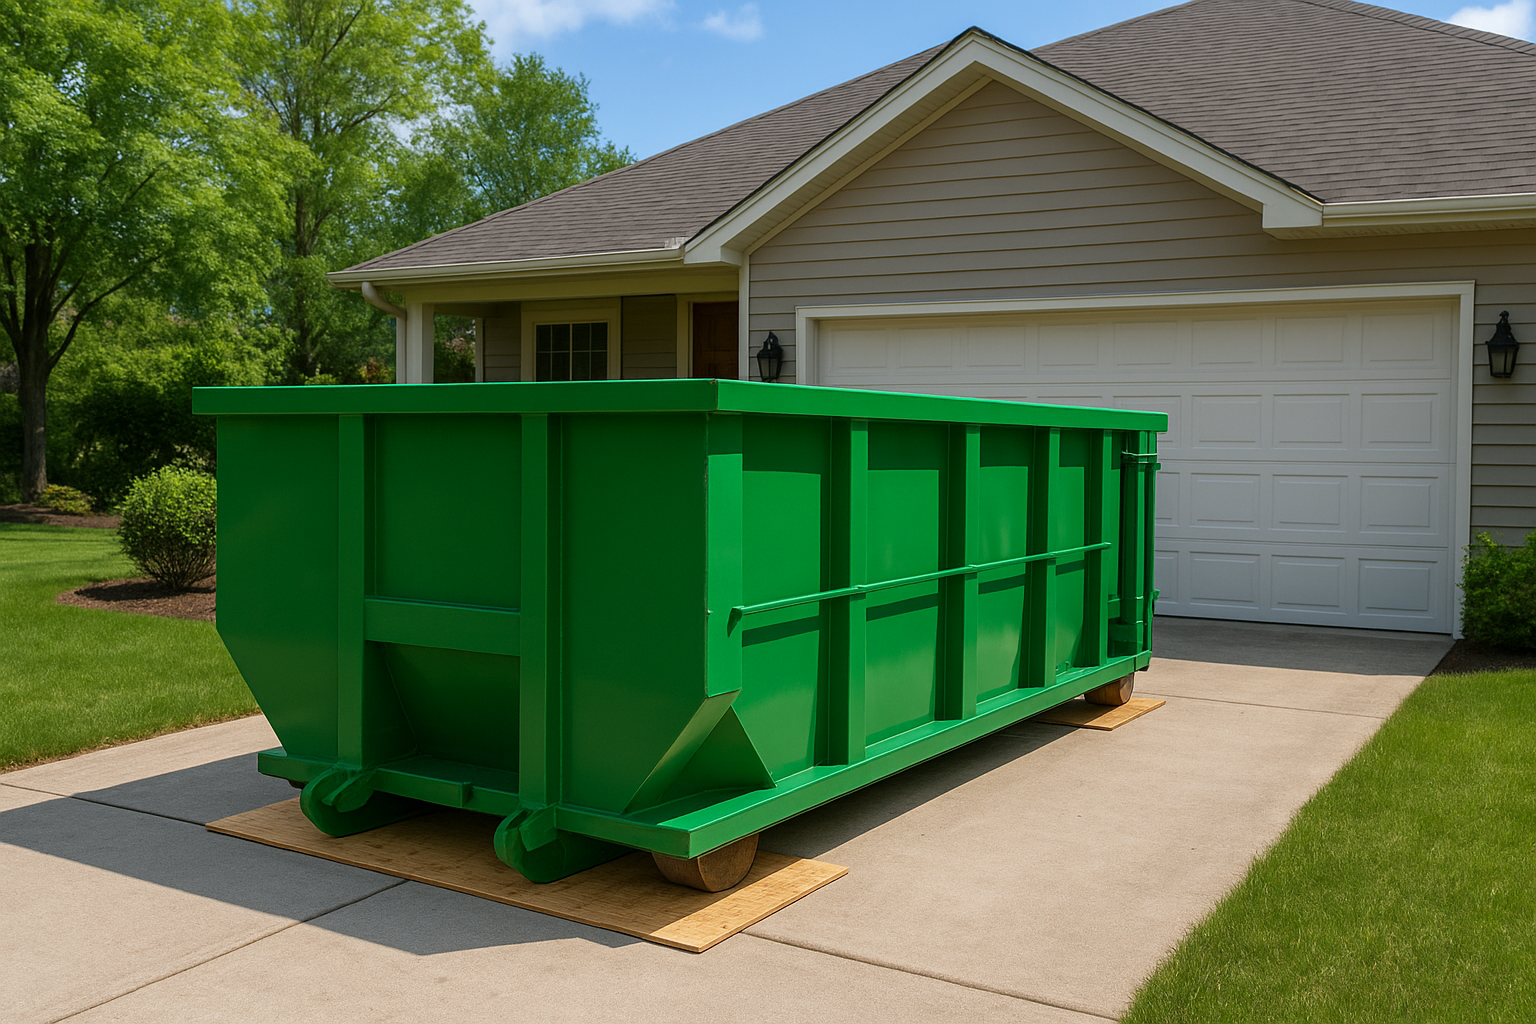
Mark your preferred placement spot clearly before the driver arrives so the container lands exactly where you need it without back-and-forth delays.
Protect your driveway surface by asking the rental company about plywood boards under the container wheels, which prevent cracking on asphalt or pavers.
Check if you need a street permit
Placing a dumpster on a public street requires a permit in most municipalities. Contact your local town hall or public works department before your delivery date to confirm requirements. Permit timelines vary by town, so start this step at least three to five business days early to avoid scheduling delays.
Step 4. Load smart, follow rules, and schedule pickup
How you fill your dumpster directly affects your total cost and pickup efficiency on a dumpster rental for home renovation. Loading without a strategy wastes container space and can push you into overage fees before the bin is even full.
Load heavy materials first
Dense debris like concrete, tile, and brick belongs at the bottom of the container. Placing heavy materials low keeps the load stable during transport and prevents the container from becoming unbalanced when the truck picks it up. Once the heavy layer is down, fill in gaps with smaller debris and loose material to use every cubic foot of space you’re paying for. Never stack debris above the container’s fill line, as the driver cannot legally haul an overloaded bin.
Call your rental company the day before your expected finish date to reserve a pickup slot rather than waiting until the container is full.
Schedule pickup before the rental period ends
Booking your pickup date in advance prevents unnecessary daily extension charges from stacking up once your renovation wraps. Give yourself a one-day buffer between your project completion and the scheduled pickup so you have time to clear out any last debris without rushing. Confirm the pickup window with your rental company and make sure someone is available to provide access if the container is behind a gate or in a restricted area.
Wrap-up and next step
A dumpster rental for home renovation comes down to four decisions: the right container size for your debris volume, a clear understanding of your total cost before you book, a placement plan that accounts for your property access and any permit requirements, and a loading strategy that keeps you within your weight limit and on schedule.
The process doesn’t have to be complicated. Getting a quote from a local provider who knows your area protects you from the surprise fees that national call-center companies stack onto your final invoice. Dump Express has been delivering dumpsters to renovation projects across Cape Cod and Plymouth for over 20 years, and the team is ready to help you pick the right container size and get it on-site fast.
Get a dumpster quote for your renovation project and have your container delivered as soon as tomorrow.