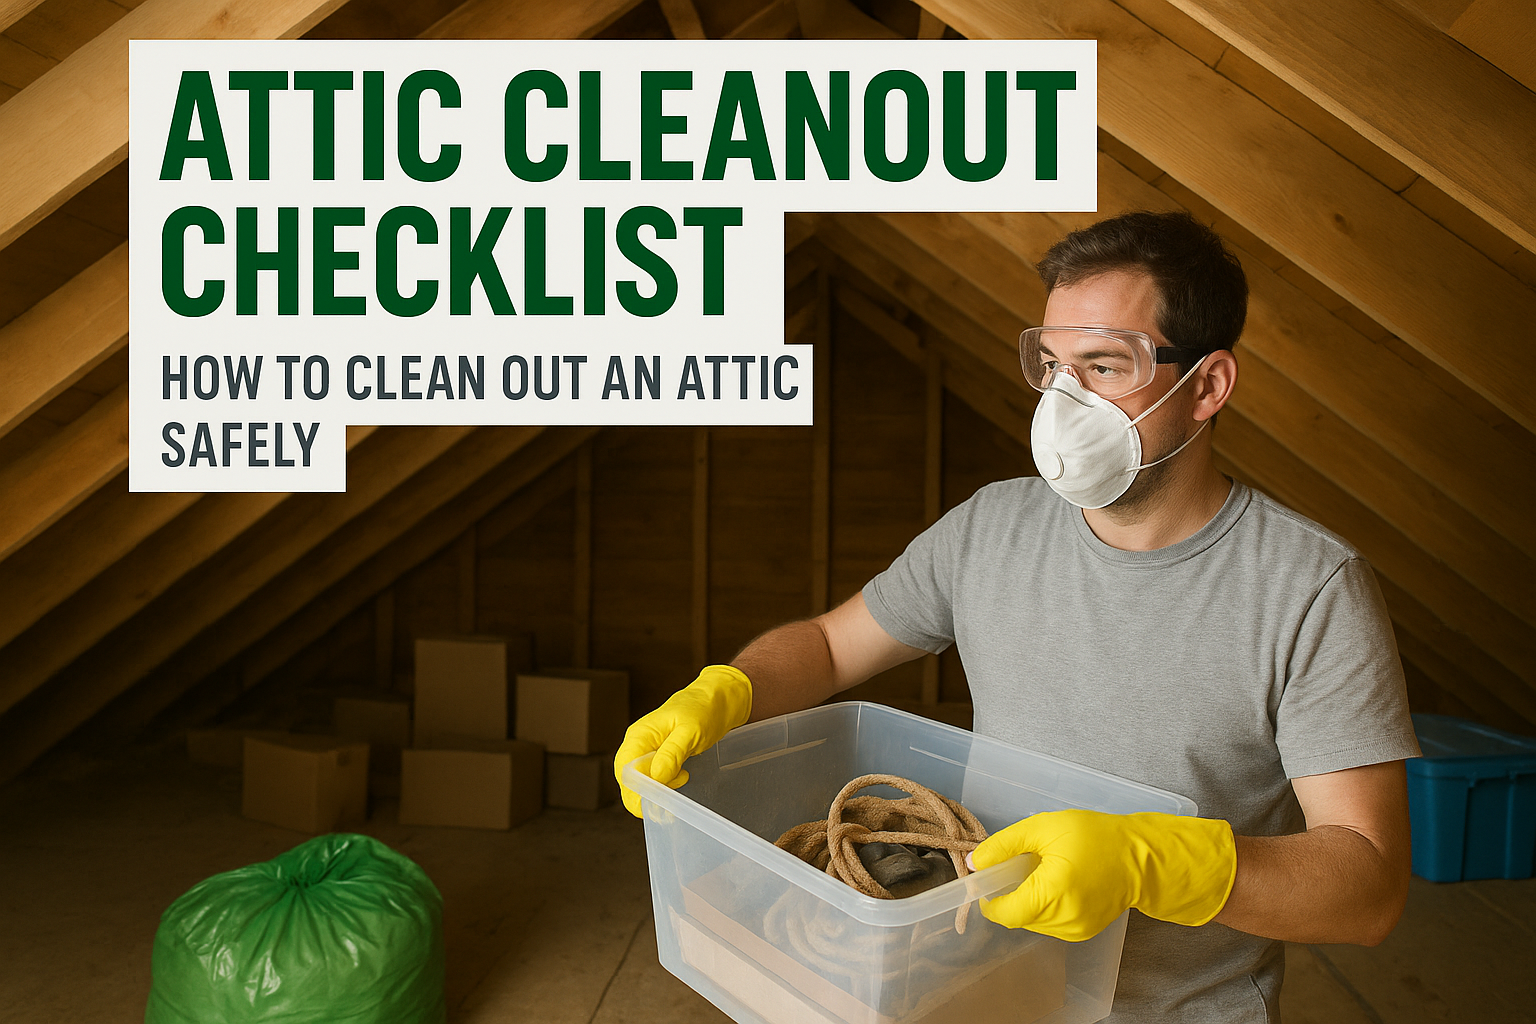
Most attics start the same way, you toss a few boxes up there, close the hatch, and forget about them. A few years later, you’ve got a space packed with old furniture, holiday decorations, clothes nobody fits into anymore, and dust thick enough to write your name in. When it’s finally time to figure out how to clean out an attic, the job can feel overwhelming before you even pull down the ladder. Between the heat, the tight space, and the sheer volume of stuff, it’s one of those projects people put off for years.
The good news is that a solid plan makes all the difference. With the right safety precautions, especially around dust, pests, and heavy lifting, an attic cleanout doesn’t have to be dangerous or chaotic. It does, however, generate a surprising amount of waste. That’s where we come in. At Dump Express, we deliver dumpsters across Cape Cod and Plymouth so you can toss everything from broken furniture to old insulation without making dozens of trips to the transfer station.
This guide walks you through the entire process step by step: prepping the space, sorting your belongings, handling hazardous situations like mold or rodent droppings, deep-cleaning every surface, and getting rid of everything you don’t need. Follow this checklist, and you’ll go from a cluttered attic to a usable space in a single weekend.
Prep the space and protect yourself
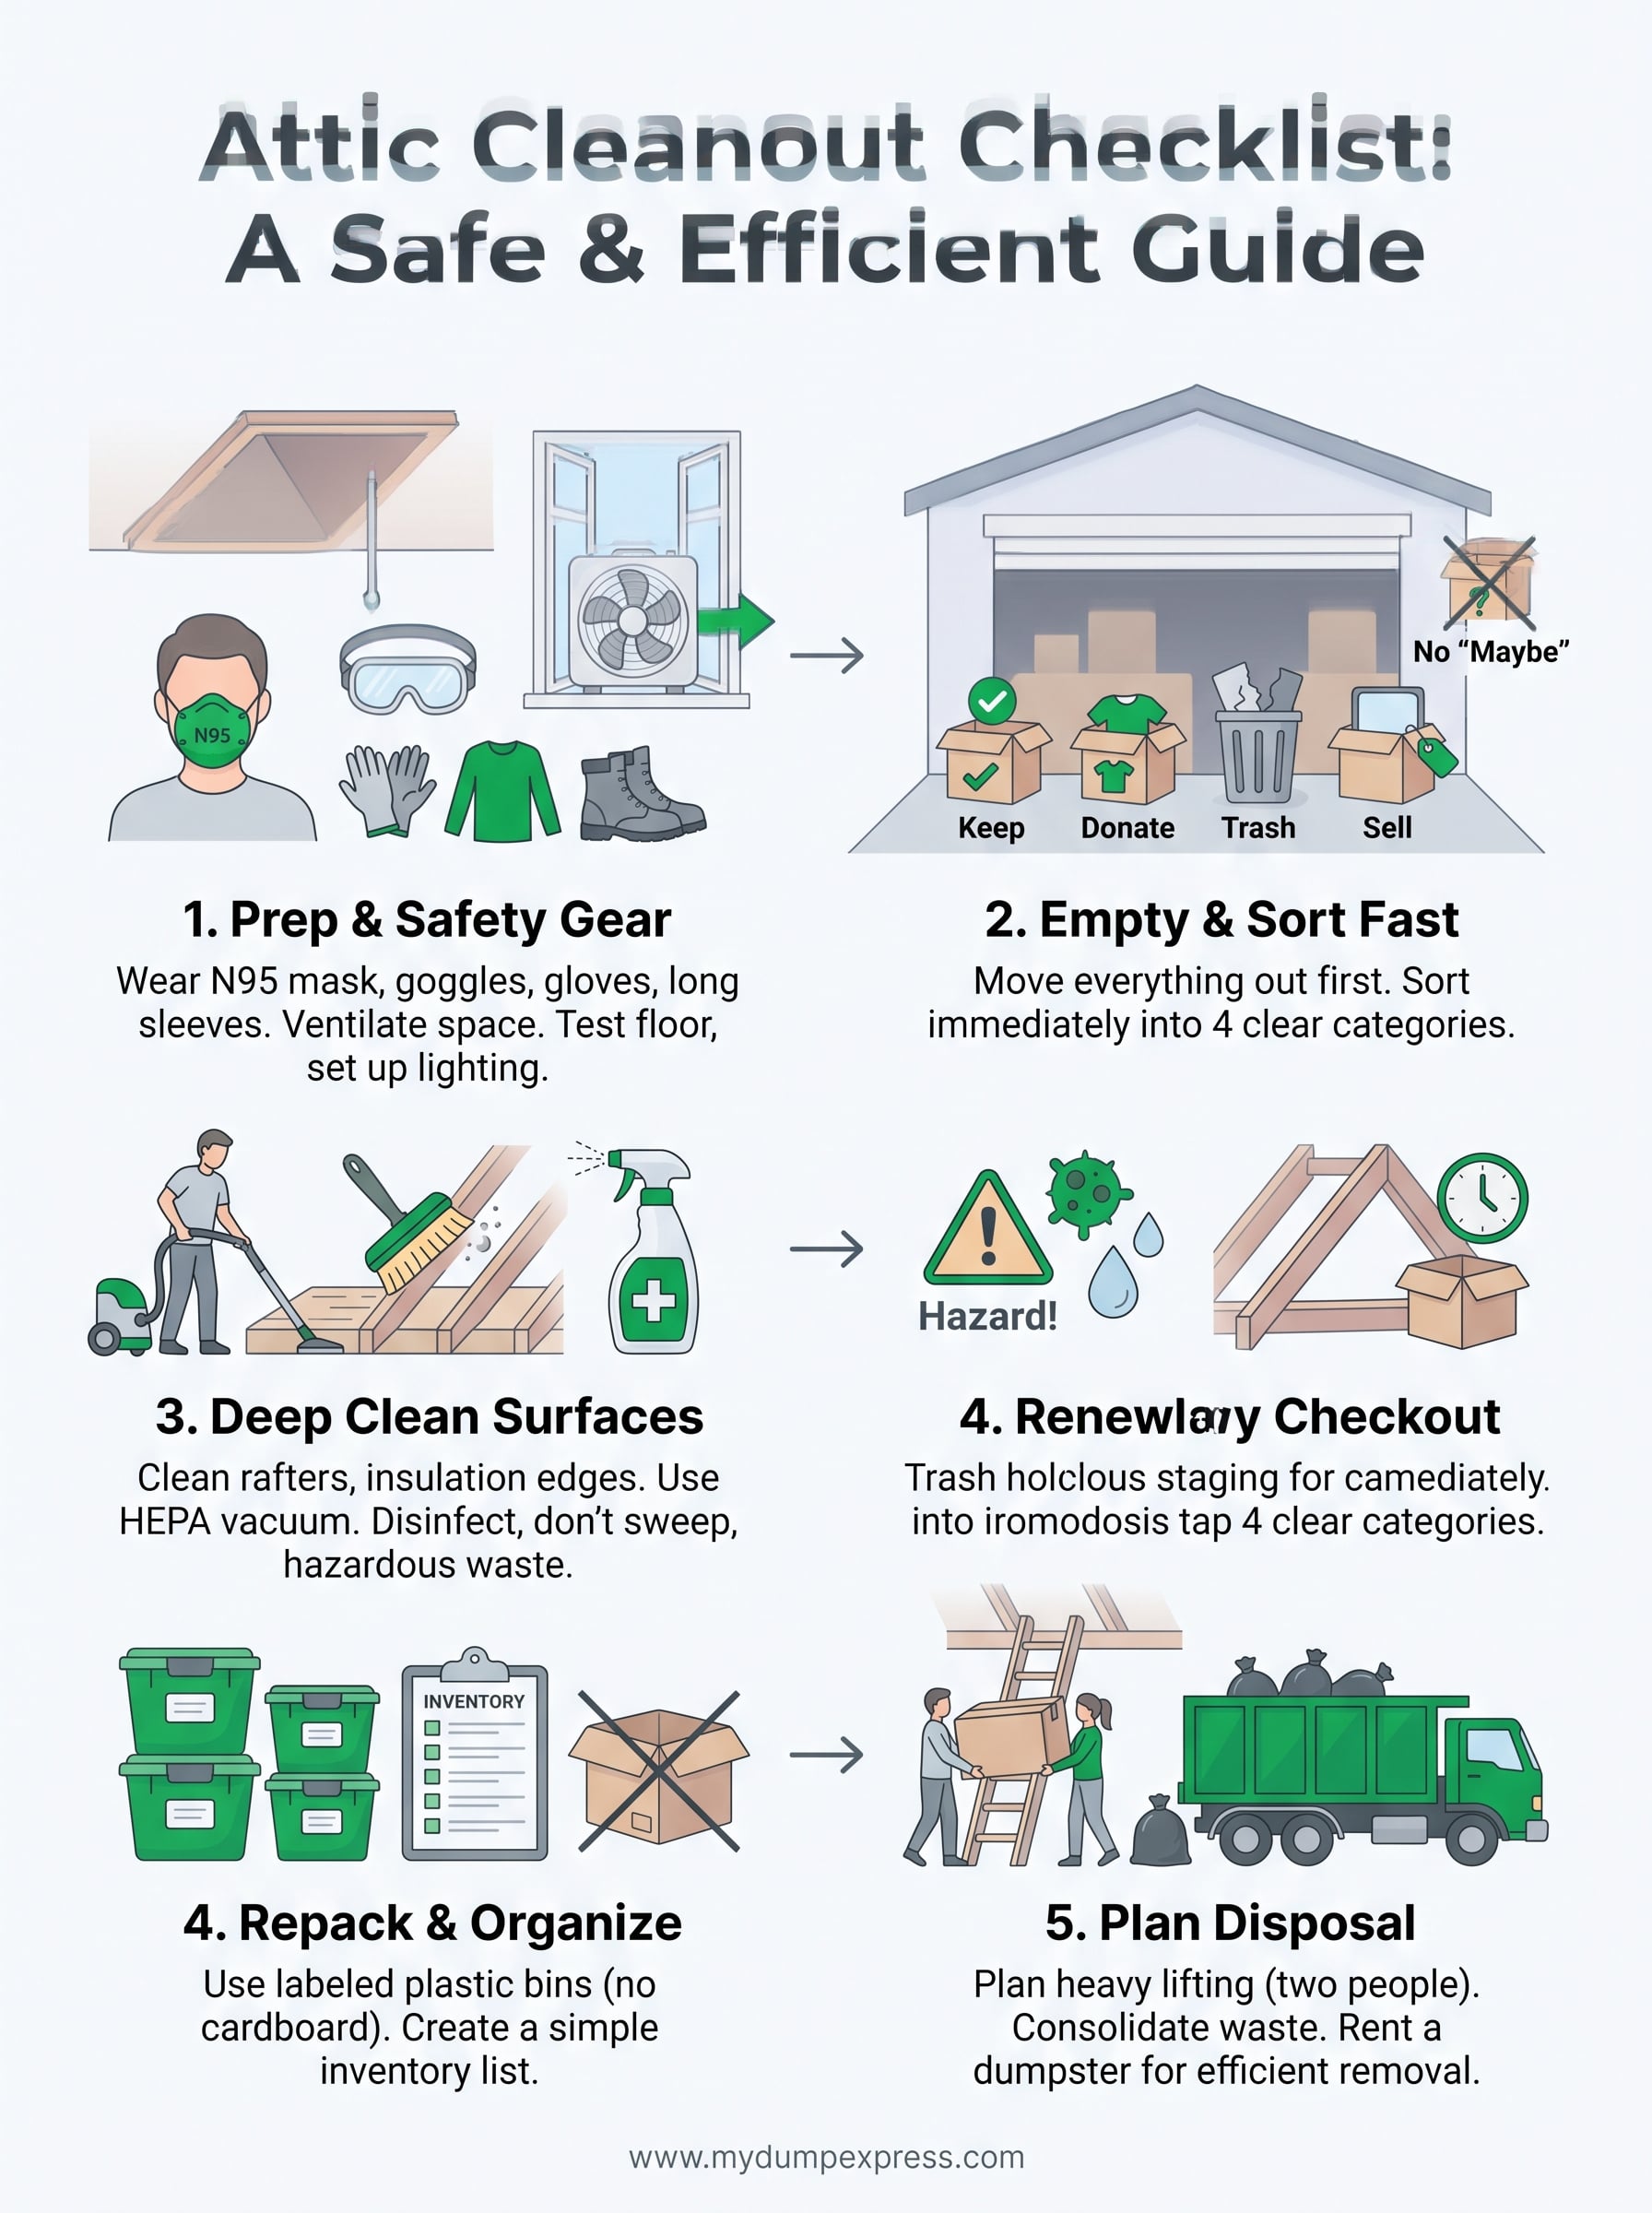
Before you move a single box, spend 30 to 40 minutes setting up the space so the work itself goes smoothly. Skipping prep is how people end up with heat exhaustion, a twisted ankle on a weak floorboard, or a respiratory issue from disturbed insulation. When you think about how to clean out an attic properly, prep is where most of the safety work actually happens. It’s not the exciting part, but it keeps the whole job from turning into an emergency.
Gear up before you climb
The inside of most attics contains a combination of fiberglass insulation particles, decades of fine dust, and potentially dried rodent waste, all of which go airborne the moment you start moving things around. You need a proper N95 respirator, not a paper dust mask. An N95 filters at least 95% of airborne particles, which matters when you’re disturbing old insulation. Add safety goggles, a long-sleeved shirt, and disposable gloves before you climb up there.
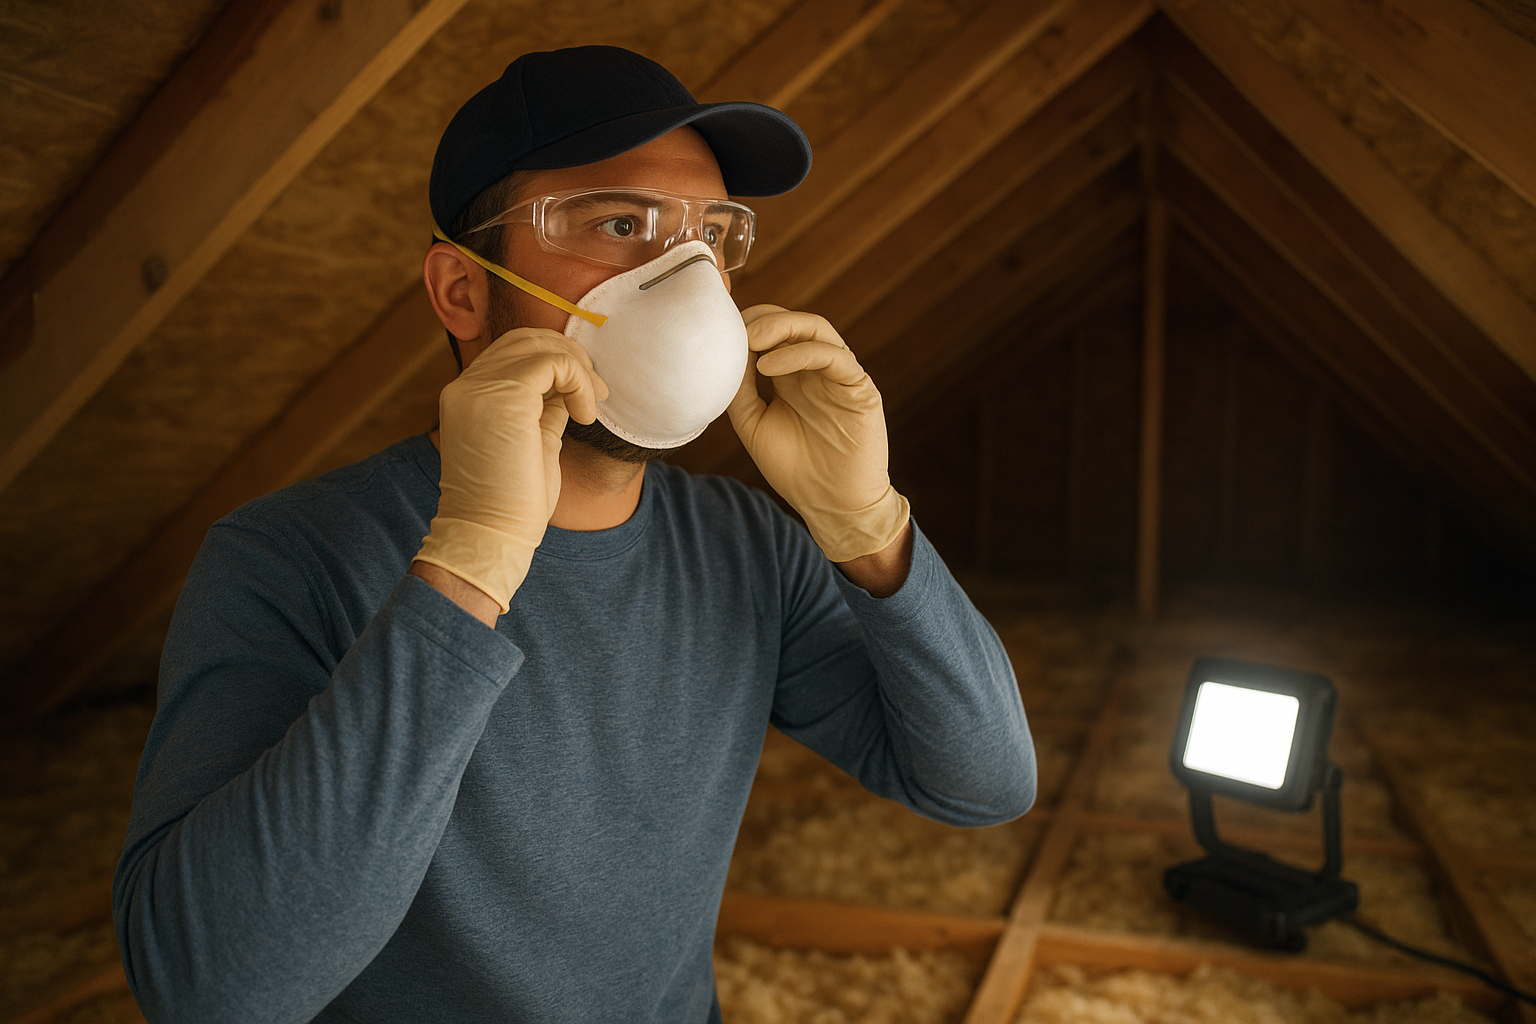
An N95 respirator is the minimum for attic work. A standard paper dust mask will not filter the fine particles released from fiberglass insulation or dried pest waste.
Wear clothes you’re fine throwing away or washing right after. Fiberglass strands cling to fabric and irritate skin if you handle those clothes later without washing them first. Closed-toe shoes with solid ankle support matter too, because attic floors are uneven and you’ll be stepping over joists in low light. Sandals or loose footwear will create a real hazard once you’re up there carrying things.
Ventilate and test the air
Open every attic vent before you start, and if the attic has a gable window or secondary access panel, open that as well. Heat builds quickly in an enclosed attic space, especially during warmer months, and working in temperatures above 90°F puts you at genuine risk of heat exhaustion. Set up a box fan pointing outward at one opening to pull stale air out while cooler air draws in from the other side.
Plan to work in the early morning when temperatures are at their lowest. Take a short break every 20 to 30 minutes, come back down, and drink water before going up again. If you feel lightheaded or short of breath at any point, stop immediately and move somewhere cooler.
Check the floor and set up your lighting
Attic floors are not always built to hold your full weight across every section. Before you carry anything heavy, test each area by pressing down firmly with one foot before shifting your full weight onto it. In most attics, you should step only on the joists, the horizontal framing members running across the space. Stepping between them on the drywall below is exactly how people fall through a ceiling.
Bring a portable LED work light and clip or hang it somewhere central in the space. A single handheld flashlight leaves too many shadows, and you’ll be reaching into corners where sharp objects, broken glass, or nesting material from pests could be hiding. A decent LED work light runs under $30 and makes the job noticeably faster. Once the light is up and your gear is on, you’re ready to start pulling things out.
Pull everything out and sort fast
The fastest way to handle how to clean out an attic is to empty the space completely before you make any decisions about what stays and what goes. Trying to sort while you’re still surrounded by clutter up there slows you down and leads to bad calls. Pull every item out and bring it down to your staging area, whether that’s a garage, driveway, or living room floor, before you start deciding what to keep.
Move everything to one landing zone
Pick a single area outside the attic where everything lands temporarily. A driveway or garage floor works best because you can spread items out widely, see the full scope of what you own, and move around them without bumping into walls. Trying to stage items across multiple rooms inside the house fragments the process and makes it hard to gauge how much you actually have.
Bring everything down in one continuous pass before you stop to evaluate anything. The moment you pause to decide whether to keep a box mid-haul, you break your rhythm and drag the job out. Keep moving items down until the attic floor is completely clear, then step back and look at what you have accumulated before making a single decision.
Sort into four piles as you go
Once everything is on the ground, sort each item into one of four categories right away: keep, donate, trash, or sell. Don’t create a "maybe" pile. Maybe piles grow, sit in your garage for months, and end up back in the attic.

The four-pile method works because it forces a decision on every item. A fifth "maybe" category just delays the same choice you have to make eventually.
Use this table to guide your sorting:
| Pile | What goes here |
|---|---|
| Keep | Items you use at least once a year and have a specific storage spot for |
| Donate | Clean, functional items in usable condition |
| Trash | Broken, water-damaged, or unsanitary items with no reuse value |
| Sell | Items in good condition worth at least $20 individually |
Work through the pile systematically from one end to the other so nothing gets revisited twice. Once an item lands in a pile, it stays there.
Clean rafters, insulation edges, and floors
Once the attic is empty, you have full access to every surface, and this is the right time to clean before anything goes back in. Knowing how to clean out an attic properly means addressing the surfaces themselves, not just the clutter. Dust, debris, and insulation particles settle on every horizontal surface over years, and skipping this step means everything you put back will collect the same grime all over again.
Gather these supplies before you start:
- N95 respirator (still required for this stage)
- Extendable microfiber duster or stiff-bristled brush
- HEPA vacuum
- Dry mop or microfiber floor pad
- Disposable contractor bags for debris
Start at the top and work down
Begin at the rafters and ridge beam at the highest point of the attic and work downward. This prevents dust and debris from landing on surfaces you’ve already cleaned. Use a stiff-bristled brush or a dry microfiber duster with an extendable handle to knock loose dirt, cobwebs, and insulation fragments from the rafters. Avoid wet cloths at this stage, because moisture on wood framing can promote mold if the attic doesn’t dry out quickly.
Cleaning from the highest point down keeps you from re-contaminating cleared surfaces. If you start at the floor, everything you brush off the rafters lands on clean boards.
After the rafters, move to any knee walls or vertical framing sections along the sides of the attic. These collect just as much dust as the ceiling framing and are easy to overlook because they sit at eye level rather than overhead. Give each section a full pass before moving on.
Clear insulation edges and floor joists
The edges where insulation meets the floor joists trap the most concentrated debris in most attics. Use a vacuum with a HEPA filter to pull up dust, insulation fragments, and any loose material sitting between and along the tops of the joists. A standard shop vac will just redistribute fine particles back into the air, so the HEPA filtration matters here.
Once the joist edges are clear, vacuum the entire floor surface and follow up with a dry mop or microfiber pad to pick up what the vacuum missed. Avoid wet mopping bare wood subfloor unless you can guarantee airflow for full drying within a few hours. Check for any soft or spongy spots in the floor while you work, since those indicate moisture damage that needs attention before you load the space with stored items again.
Sanitize after mice, bats, or mold
If you find droppings, guano, or dark fuzzy patches when figuring out how to clean out an attic, stop and handle these before you continue with any other cleaning. Rodent droppings, bat guano, and mold spores all carry real health risks, and disturbing them without proper precautions sends dangerous particles into the air you’re breathing. This is the one stage where corners genuinely cannot be cut.
Handle rodent droppings safely
Do not sweep or vacuum rodent droppings with a standard vacuum. Sweeping disperses hantavirus particles into the air, where you can inhale them. Instead, follow the CDC’s recommended approach: spray the droppings with a disinfectant solution and let them soak for at least five minutes before wiping them up with paper towels. Use a 1:10 bleach-to-water mixture (one part bleach to ten parts water) if you don’t have a commercial disinfectant on hand.
Never dry-sweep rodent droppings. Always wet them first with disinfectant and let the solution sit for at least five minutes before wiping.
Bag all contaminated paper towels and disposable rags in sealed plastic bags before dropping them into your trash or dumpster. After cleanup, wash your gloved hands before removing your gloves, then wash your bare hands immediately after. Wipe down any non-porous surfaces the rodents contacted using the same bleach solution.
Clean up after bats
Bat guano requires the same wet-first approach as rodent droppings, but it carries an additional risk: Histoplasma capsulatum, a fungal spore that causes histoplasmosis when inhaled. Wear your N95 respirator and goggles throughout the entire process. Dampen the guano with water and a small amount of dish soap before scooping it into sealed bags. Avoid breaking up any dried guano piles directly, since that releases the highest concentration of spores.
Address mold before it spreads
Mold in an attic almost always traces back to a moisture source, whether that’s a roof leak, inadequate ventilation, or condensation buildup. Before you clean any visible mold, identify and fix the source, or the mold will return within weeks regardless of how thoroughly you scrub. For small surface patches under 10 square feet, scrub with a bleach solution and let the area dry fully with ventilation running.
Larger infestations or mold on insulation or structural wood should be handled by a licensed remediation contractor. Disturbing a large mold colony without full containment equipment spreads spores throughout the attic and into the living space below.
Repack with bins, labels, and an inventory
Once the attic is clean and dry, what goes back in determines whether the space stays organized or turns into the same problem you just spent a weekend fixing. The way you pack and label at this stage is the difference between a space you can actually use and one that requires another full cleanout in three years. When you think about how to clean out an attic as a long-term project rather than a one-time event, how you store things matters as much as what you store.
Choose the right bins and label everything
Skip cardboard boxes entirely for attic storage. Cardboard absorbs moisture, breaks down over time, and gives mice easy nesting material. Use uniform stackable plastic bins with lids that snap shut securely. Uniform sizing matters because it lets you stack bins without wasting vertical space or creating unstable columns that topple when you reach for something on the bottom.
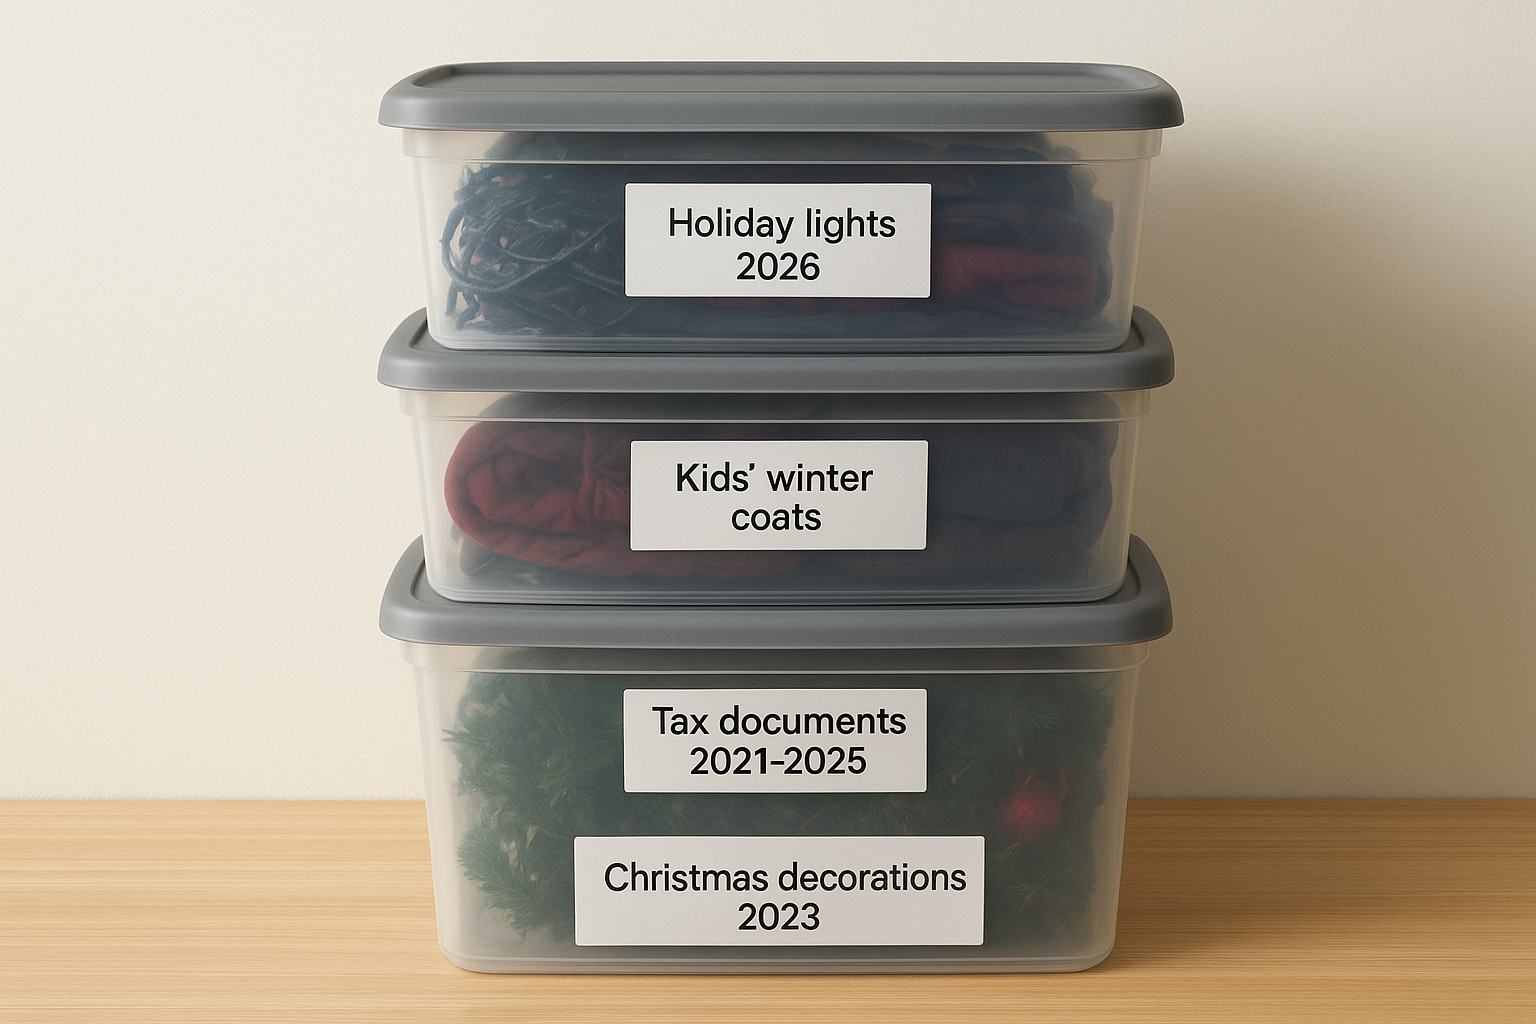
Uniform plastic bins with locking lids stack more efficiently and resist moisture and pests far better than cardboard boxes.
Label every bin on the short side and the top, not just the front. When bins are stacked four high, the front face is the only thing you can’t easily see. Use a label maker or write clearly on painter’s tape with a permanent marker. Each label should state the contents in plain terms and the year you packed it. "Holiday lights 2026" tells you more at a glance than "Christmas stuff."
Build a simple attic inventory
A written inventory takes about 15 minutes to put together and saves hours of digging later. Create a spreadsheet or use a notes app and log each bin with a number, a short description of contents, and the storage zone in the attic where it lives. Tape a matching number to the bin itself.
Use this template as a starting point:
| Bin # | Contents | Zone | Packed |
|---|---|---|---|
| 01 | Holiday lights, tree stand | Left side, row 1 | 2026 |
| 02 | Kids’ winter coats, sizes 6-8 | Right side, row 1 | 2026 |
| 03 | Tax documents 2021-2025 | Center, row 2 | 2026 |
Keep one copy of this inventory on your phone and one printed copy taped inside the attic access panel so anyone in the household can find what they need without pulling every bin down.
Plan heavy lifting and disposal runs
The final physical challenge of learning how to clean out an attic is getting heavy and bulky items out without injuring yourself or damaging your home. Mattresses, old furniture, and heavy storage bins don’t navigate attic hatches easily, and most people figure out the hard way that a narrow pull-down ladder isn’t designed for awkward loads. Plan your removal sequence before you start carrying anything heavy, and the whole process will go significantly faster.
Move bulky items without injuring yourself
Never carry a large item down an attic ladder alone. A second person stationed at the base of the ladder or on the floor below controls the weight from the bottom while you guide from above, which prevents the item from swinging free and pulling you off balance. Before you bring anything down, clear the area below the hatch completely so you have an unobstructed path to set things down immediately.
Two people handling bulky attic items prevent the majority of falls and dropped-load injuries that happen during cleanouts.
For items too heavy to carry safely as a unit, break them down first. Disassemble bed frames, shelving units, and large wooden furniture into their smallest components before moving them through the hatch. A shelving unit that weighs 80 pounds assembled weighs 20 pounds per section once you separate the frame and pull the shelves out. Keep a cordless screwdriver and a utility knife nearby so you can take apart anything that comes apart without a full tool setup.
Consolidate your disposal into one run
Spreading disposal across multiple trips to the transfer station adds hours to your total project time and costs you in fuel and drop-off fees. Stage all trash, broken items, and debris in one central location, typically your driveway, before you haul anything away. Once everything is consolidated, you can load a single vehicle or container and clear it in one pass.
Renting a dumpster is the most efficient option when your attic cleanout produces more waste than fits in standard trash bags. At Dump Express, we deliver dumpsters directly to your driveway across Cape Cod and Plymouth so you can fill it on your own schedule without rushing to meet transfer station hours. Load everything at once, call for pickup, and the job is finished without a single extra trip.
Keep your attic clean going forward
Now that you know how to clean out an attic from start to finish, the goal is to avoid repeating the same full-scale project every few years. Schedule a quick 20-minute inspection twice a year, once in spring and once in fall, to catch early signs of moisture, pests, or clutter buildup before they turn into serious problems. Check your bins, verify your inventory is still accurate, and pull anything you no longer use before it piles up.
Set one firm rule for every new item that goes into the attic: it needs a labeled bin and a spot on your inventory list before it goes up there. That single habit prevents the slow accumulation that turns a clean space back into a chaotic one.
When your next cleanout or renovation generates more waste than curbside pickup can handle, rent a dumpster from Dump Express and clear everything in one trip without making repeated hauls to the transfer station.